- Introduction
- 1. About this Workshop
-
2.
Getting Started
- 2.1. Sign up for Pusher
- 2.2. Laravel App Setup
- 2.3. Setting Environment Variables
- 2.4. Laravel Pusher Bridge
- 2.5. Pusher Event Broadcaster
- 2.6. Bridge v Broadcaster
- 2.7. Debugging Server-Side Integration with Pusher
- 2.8. Using the Pusher JavaScript library
- 2.9. Debugging with the Pusher JavaScript library
- 2.10. Getting Started - What we've learned
- 3. Real-Time Notifications
- 4. Activity Streams
- 5. Chat
- 6. What else can Pusher do?
- Published with GitBook
Debugging your client-side integration with Pusher
The Pusher Debug Console is great for understand how the Pusher JavaScript library is interacting with Pusher.
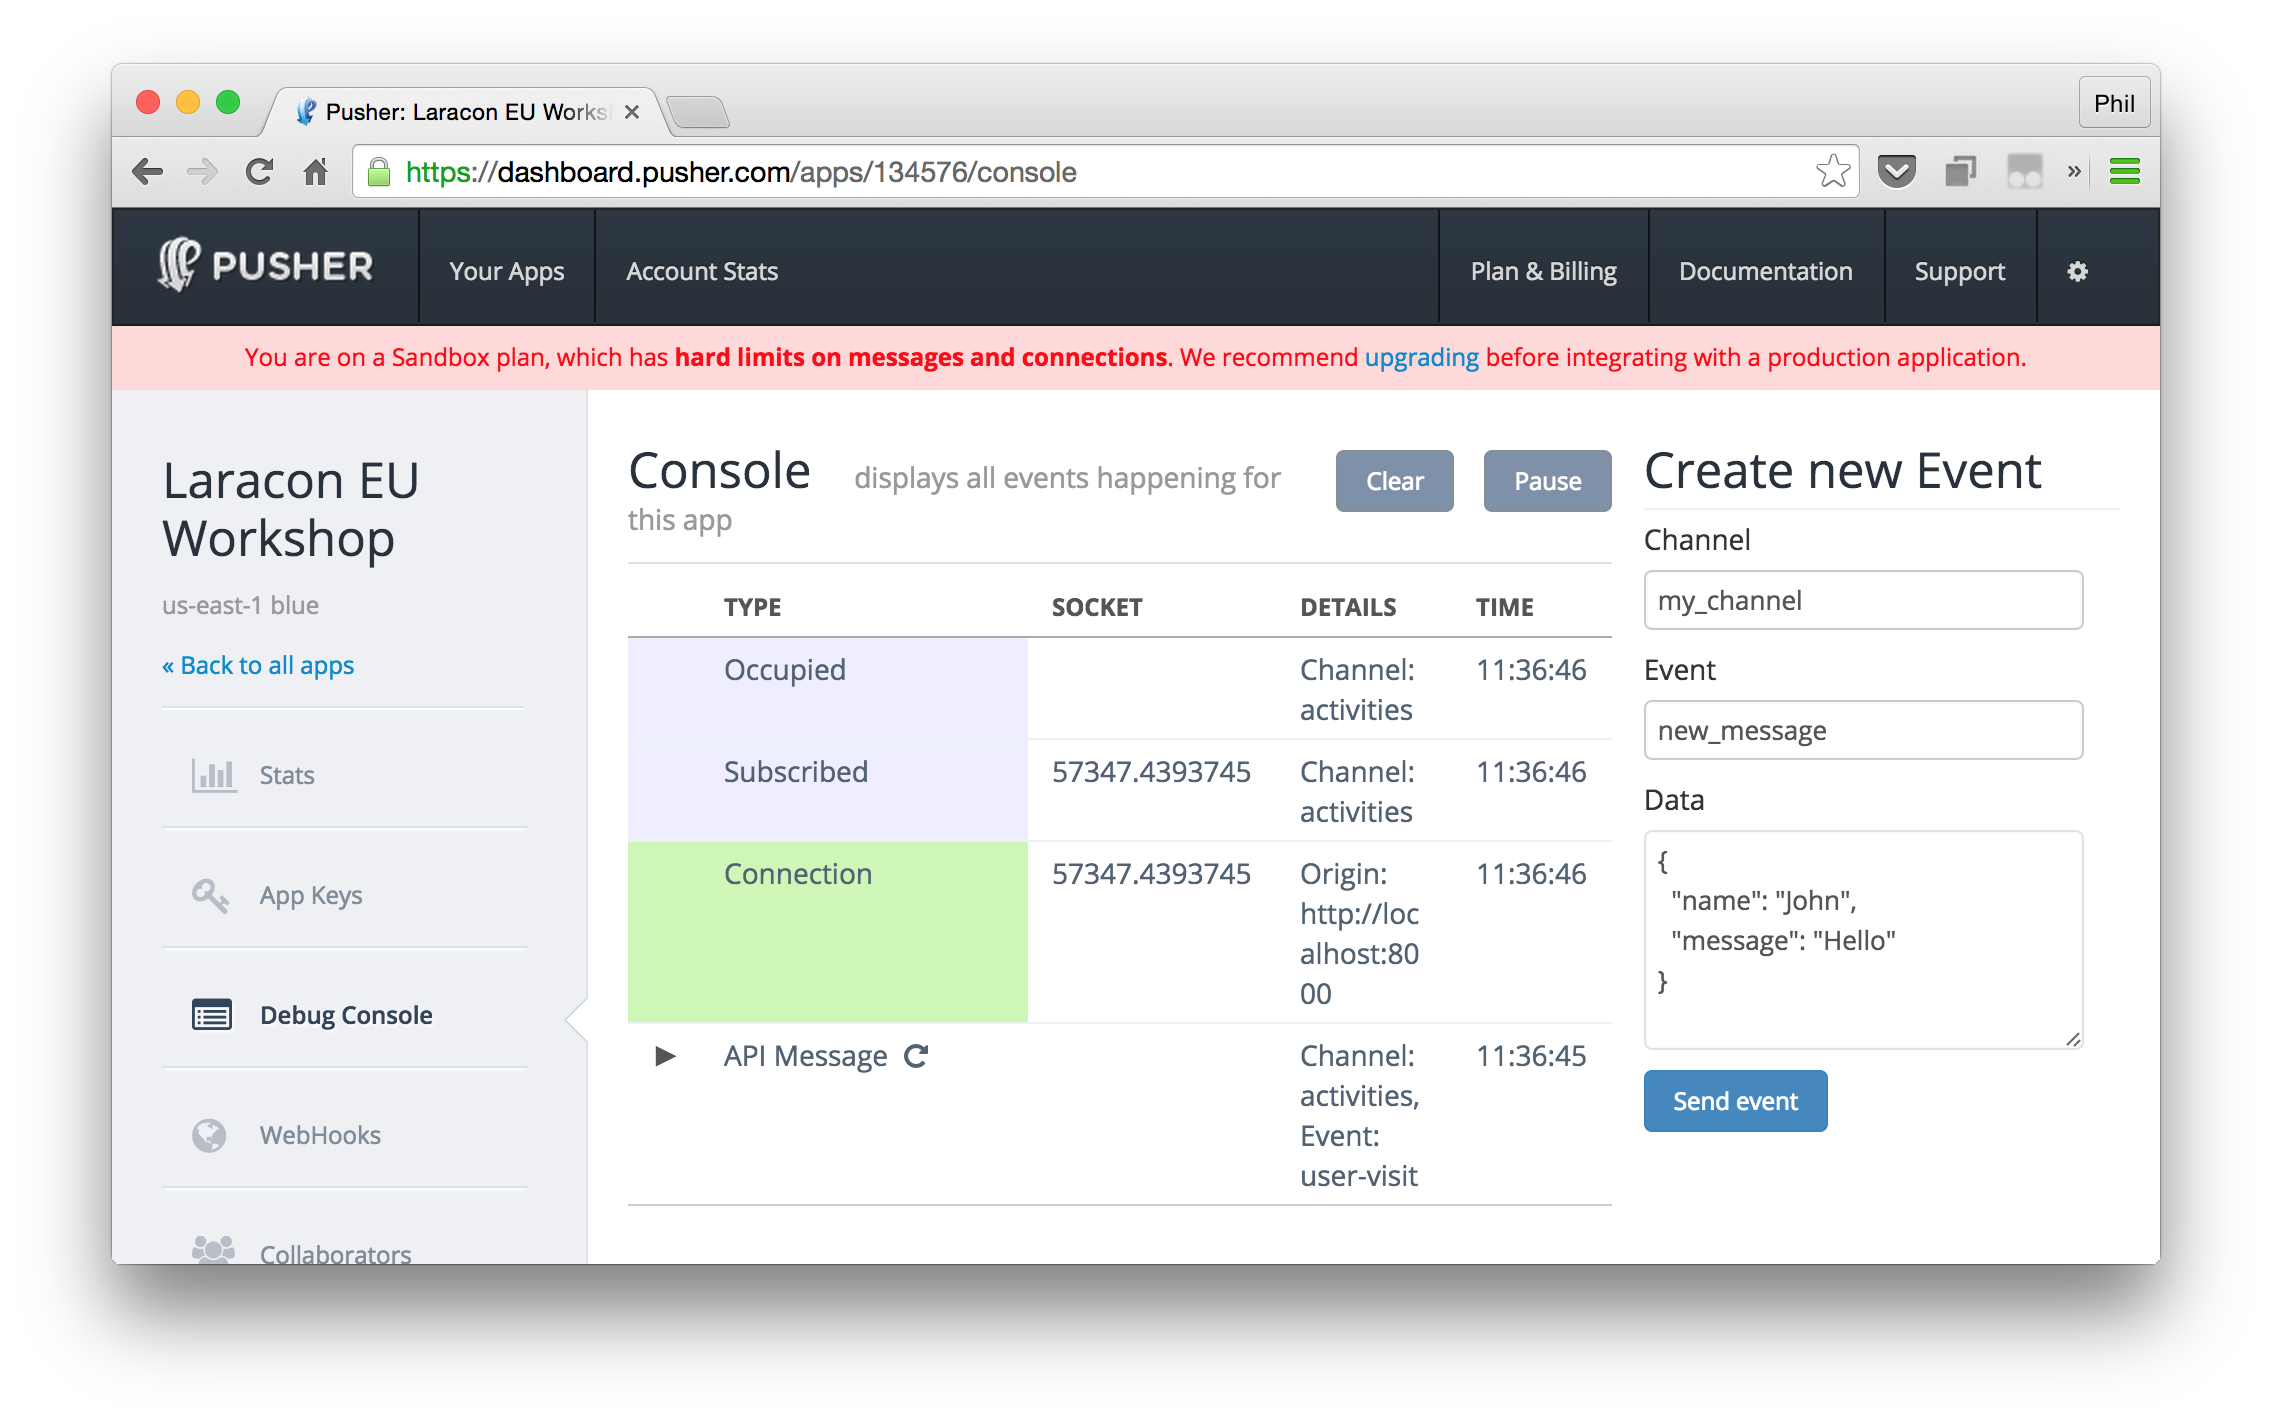
Here's what to check:
- Are you seeing a
Connectionentry. If not, check you're using the correct Pusher Application Key. - Are you seeing a
Subscribedentry and is theChannelthe one you expect to see? - If the above seem fine then make sure the
Subscribedentry is occuring before theAPI Messageentry. If not, then it means the message is being sent before Pusher knows the client is interested in it.
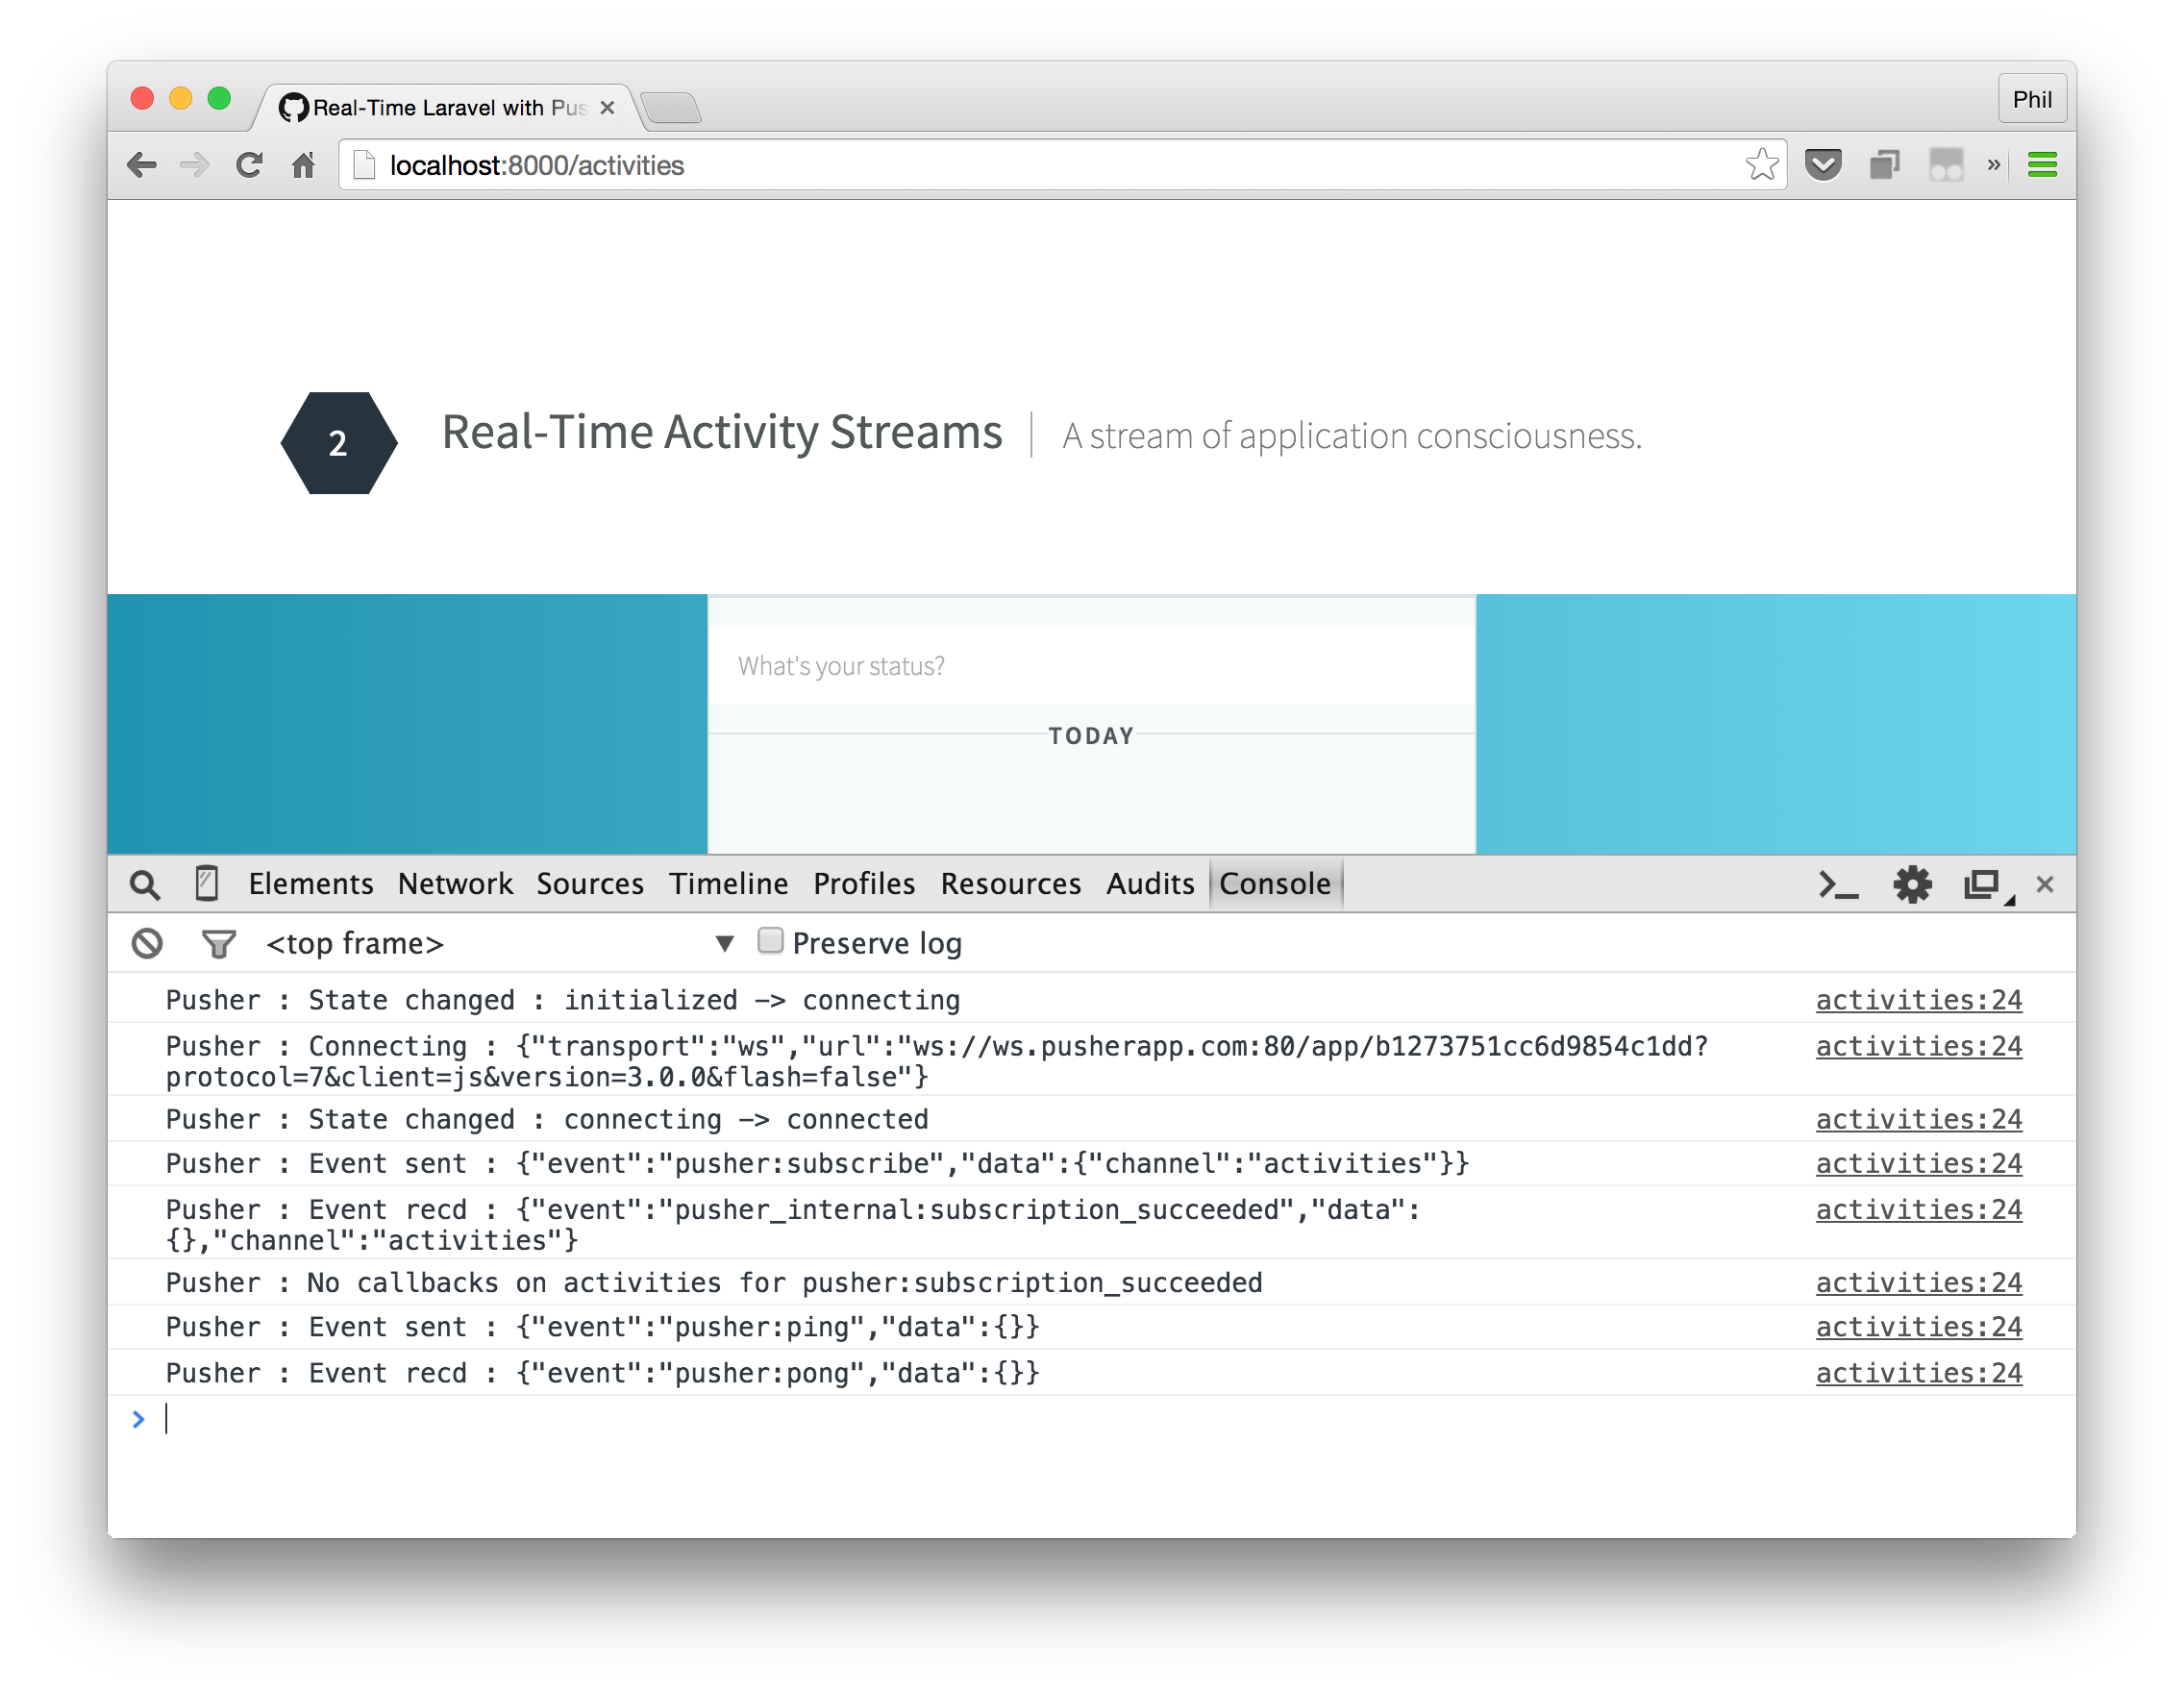
As well as the Pusher Debug Console you can also configure the Pusher JavaScript library so that it will log information, exposing its internal workings, to the browser console.
Update your client-side code:
<script src="//js.pusher.com/3.0/pusher.min.js"></script>
<script>
Pusher.log = function(msg) {
  console.log(msg);
};

var pusher = new Pusher("{{env("PUSHER_KEY")}}")
...
From here we can check:
- Does the logging indicate that a connection is being established?
Pusher : State changed : connecting -> connected - Is the subscription to the channel succeeding?
Pusher : No callbacks on test-channel for pusher:subscription_succeeded - Is the event being received and does the event name match the one you're using in your call to
bind?Pusher : Event recd : {"event":"TestEvent","data":{"text":"Broadcasting in Laravel using Pusher!"},"channel":"test-channel"}
Where next?
Still stuck? Ask the instructor if you're in a workshop. If not, take a look at the Pusher Support desk. From there you can contact support if required.
Let's see what we've just learned.