- Introduction
- 1. About this Workshop
-
2.
Getting Started
- 2.1. Sign up for Pusher
- 2.2. Laravel App Setup
- 2.3. Setting Environment Variables
- 2.4. Laravel Pusher Bridge
- 2.5. Pusher Event Broadcaster
- 2.6. Bridge v Broadcaster
- 2.7. Debugging Server-Side Integration with Pusher
- 2.8. Using the Pusher JavaScript library
- 2.9. Debugging with the Pusher JavaScript library
- 2.10. Getting Started - What we've learned
- 3. Real-Time Notifications
- 4. Activity Streams
- 5. Chat
- 6. What else can Pusher do?
- Published with GitBook
Triggering Activity Events
We clearly don't have time to build a full social network. But we can support a few simple activities in order to demonstrate how events can be used to represent each activity type.
Create the Controller and View
Save the ActivityController.php template to app/Http/Controllers/ActivityController.php.
Here's the code in full followed by some explanation:
<?php
namespace App\Http\Controllers;

use Illuminate\Http\Request;
use Illuminate\Support\Facades\App;
use Illuminate\Support\Facades\Session;

class ActivityController extends Controller
{
    var $pusher;
    var $user;

    public function __construct()
    {
        $this->pusher = App::make('pusher');
        $this->user = Session::get('user');
    }

    /**
     * Serve the example activities view
     */
    public function getIndex()
    {
        // If there is no user, redirect to GitHub login
        if(!$this->user)
        {
            return redirect('auth/github?redirect=/activities');
        }

        // TODO: provide some useful text
        $activity = [
            'text' => '...',
            'username' => $this->user->getNickname(),
            'avatar' => $this->user->getAvatar(),
            'id' => str_random()
        ];

        // TODO: trigger event

        return view('activities');
    }

    /**
     * A new status update has been posted
     * @param Request $request
     */
    public function postStatusUpdate(Request $request)
    {
        $statusText = e($request->input('status_text'));

        // TODO: trigger event
    }

    /**
     * Like an exiting activity
     * @param $id The ID of the activity that has been liked
     */
    public function postLike($id)
    {
        // TODO: trigger event
    }
}
In the code above you'll notice that the __construct() attempts to grab the user from the Session and in getIndex() the value of $this->user is checked. If there isn't a logged in user the app redirects in order for the user to log in.
By having a user we can identify who has triggered an activity event. There's an example in the code above of getting both the username and avatar. This can then be used when we trigger events via Pusher, and ultimately display that information in our user interface.
The ActivityController relies on an activities view so let's create that. Save the activities.blade.php template to resources/views/activities.blade.php.
Finally, add an entry to your app/Http/routes.php:
Route::controller('activities', 'ActivityController');
Now we want to trigger activity events.
Triggering Activity Events
There are three potential types of activity in our ActivityController:
- A user visits the Activities page:
user-visit - A new status update has been posted:
new-status-update - A status update has been "liked":
status-update-liked
For each event trigger an event on an activities channel. Each event should contain some text to display about the event, a username and an avatar to identify who triggered the event, and a unique id. Since we're not going to be using a database let's just use str_random() to generate a unique ID.
For example:
$activity = [
    'text' => $this->user->getNickname() . ' has visited the page',
    'username' => $this->user->getNickname(),
    'avatar' => $this->user->getAvatar(),
    'id' => str_random()
];

$this->pusher->trigger('activities', 'user-visit', $activity);
user-visit event is being triggered in the Pusher Debug Console.
For the event that's triggered in the postLike($id) action also send the ID of the activity that the user liked on a likedActivityId property using the $id value.
$activity = [
    // Other properties...

    'likedActivityId' => $id
];
Building the ActivityStream UI
The view, defined in resources/views/activities.blade.php, already has some functionality, but you still need to hook up Pusher and the real-time events.
User Visited
Whenever the /activities endpoint (getIndex() action) is access a user-visit event is triggered on the activities channel.
If you haven't already done so, navigate to http://localhost:8000/activities endpoint in the browser and make sure the event is triggered by checking the Pusher Debug Console.
Once you're sure the event is being triggered you can add JavaScript to the view to subscribe to the activites channel on the client and bind to the user-visit event. There's already a addUserVisit that can be used to handle the event and add an activity to the stream UI.
Status Updates
Next we should handle the status updates that users can post from the view.
Navigate to http://localhost:8000/activities and make sure that entering some text into the "What's your status?" input and pressing enter results in your /activites/status-update endpoint (postStatusUpdate(Request $request) action) being called.
You can check this in two ways:
- using the browser developer tools network tab
- via the Pusher Debug Console
Once you know the status updates are hitting your endpoint and resulting in an event being triggered via Pusher you can bind to the new-status-update event. There's already a addStatusUpdate function that you can use to handle the event.
Likes
Once you have status updates coming in you'll see that each activity has a small ♥ (heart) icon that can be clicked. When it's clicked the sendLike function is called sending down the activity ID. This results in the /activities/like endpoint (postLike($id)) being called and the status-update-liked event being triggered on the activities channel.
Make sure that clicking the ♥ (heart) icon does what it's supposed to - you know the drill!
Finally we want to wire up the incoming status-update-liked and update the UI.
This one hasn't been implemented for you. Here are the steps to help:
- Bind to the event and create a callback handler function
- Use the
addActivity(type, data)function to add an activity stream element - Stretch Task: Identify the element for activity that's been liked via the
data.likedActivityIdvalue and add a "Liked Count" value to the element with the class.like-countindicating the number of times that activity has been liked
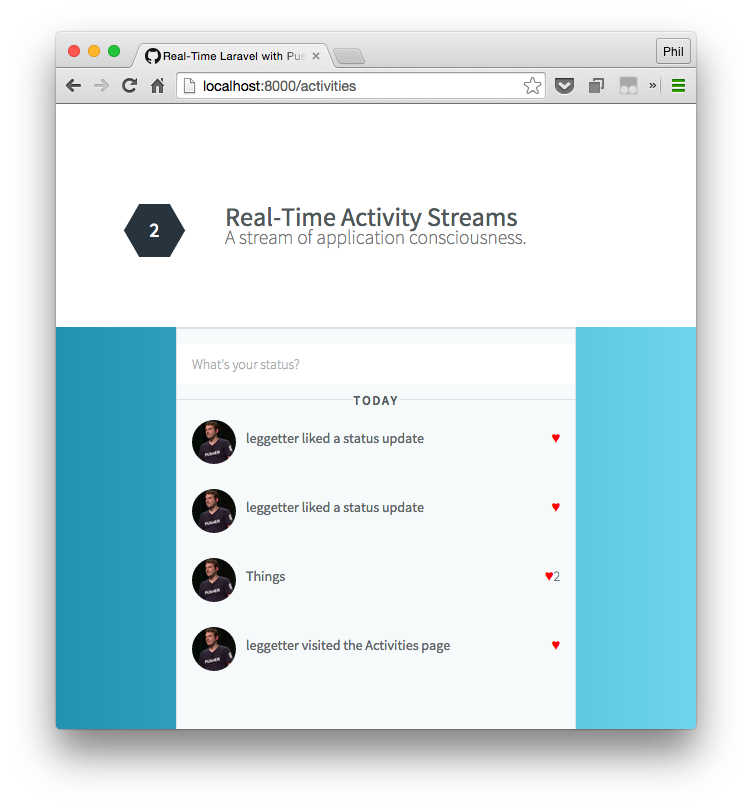
Once complete it should look at little bit like this:
What's next?
Let's go over what we've covered in this section.